
How do I create a custom compliance check group and check
Check groups and checks can be customized to your school’s needs. Schools may want to use this feature to record and track student and staff health (temperature, illness symptoms), incidents/accidents, naps/rest, meals, and/or parent participation.
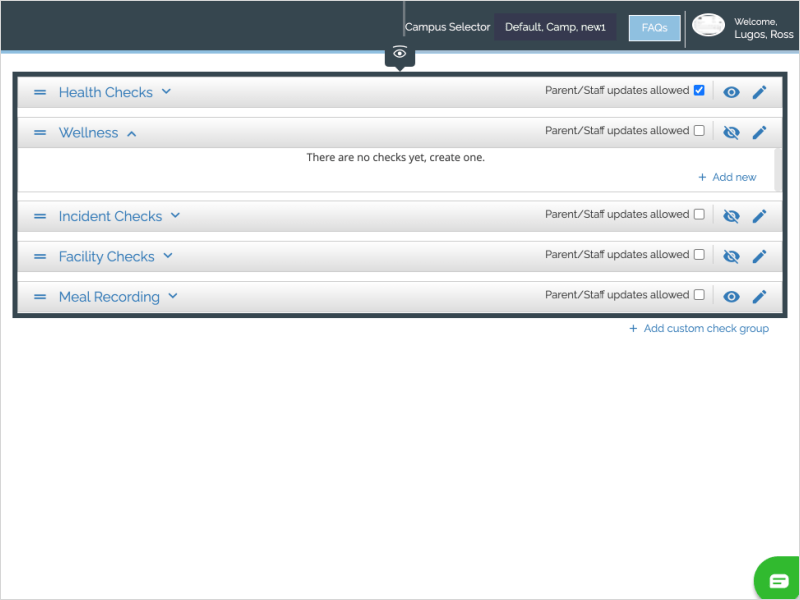
Individual Checks are organized into Check Groups. Check Groups can be re-ordered, published or unpublished, and accessible to parents and staff to create their own checks or only available to school administrators/staff. Individual checks can be published or unpublished.
Please note that recorded checks are visible to the child’s parents in their child’s History tab, regardless of whether parent updates are allowed. All recorded staff checks are visible to the staff member in the staff’s profile. Checks should not be used for information you do not want parents to see.
*Compliance Check is a premium feature. Please contact support@curacubby.com if you are interested in adding this feature to your subscription.
To create a check group:
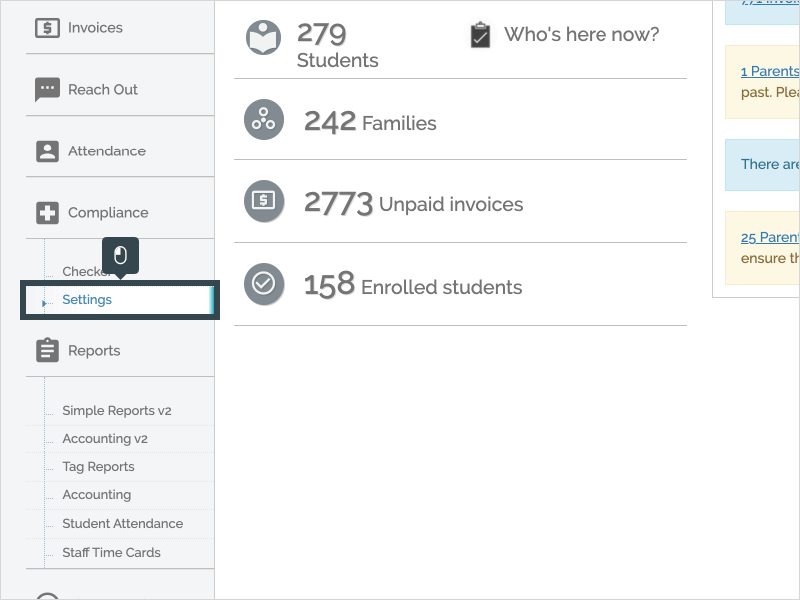
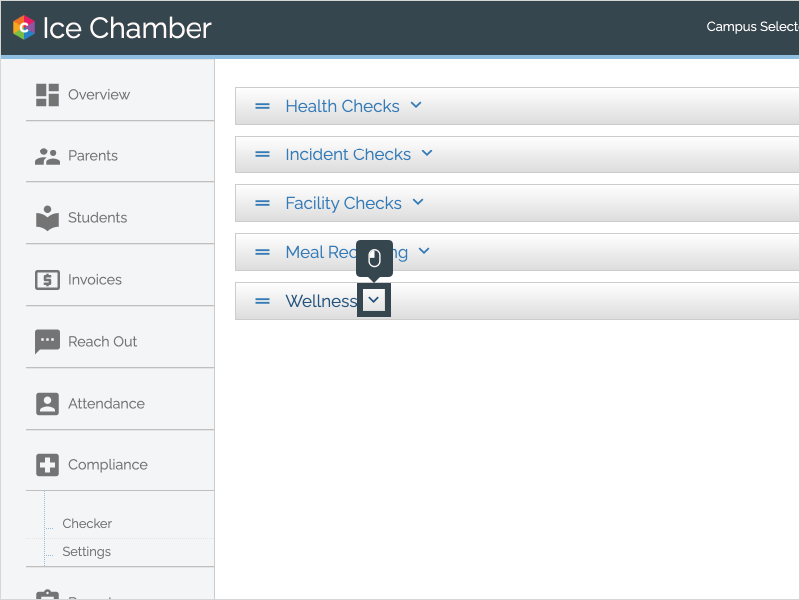
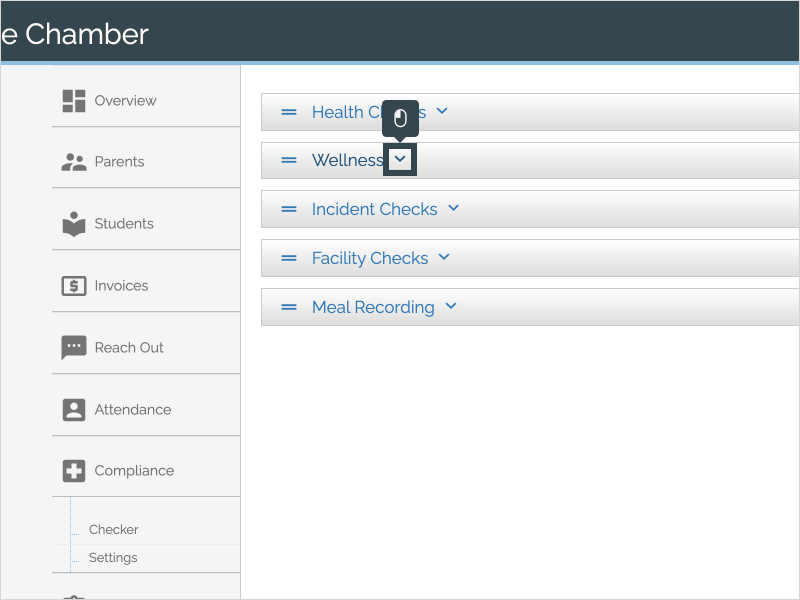
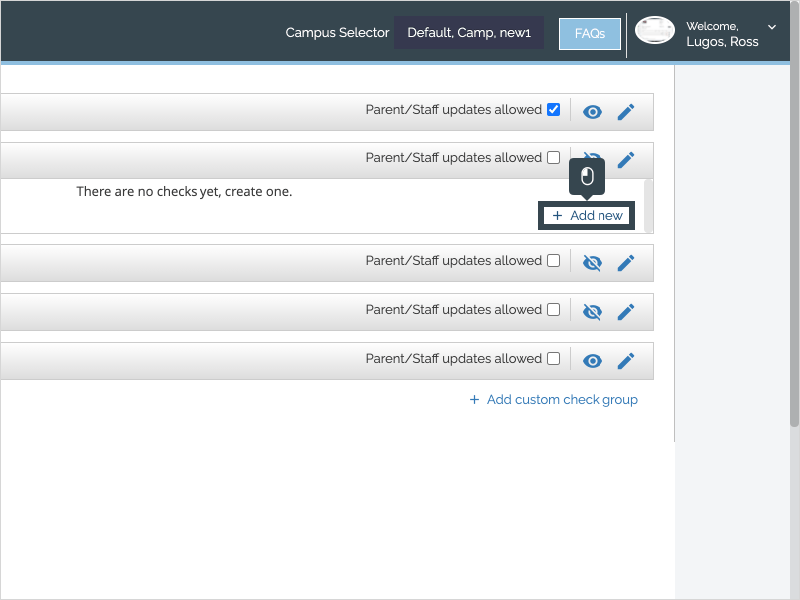
- Click “Settings” under “Compliance” on the left sidebar
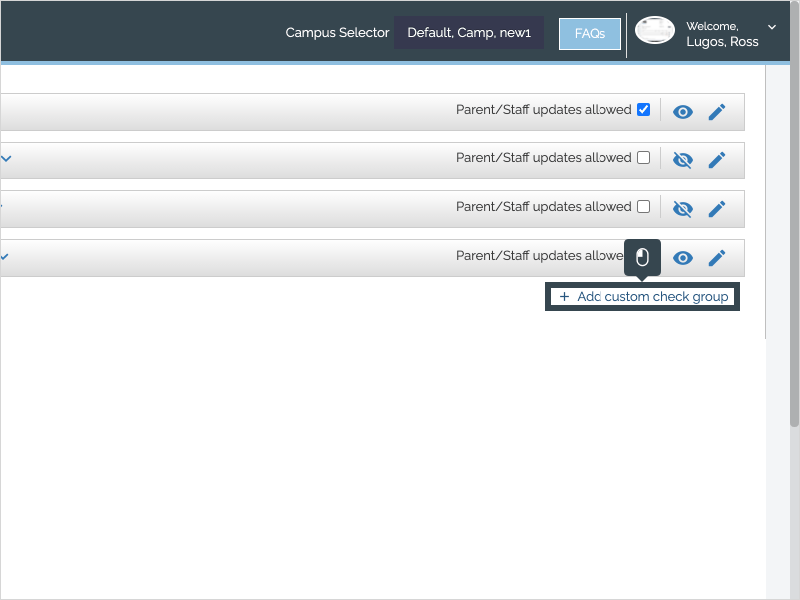
- Click “+ Add Custom Check Group”
- Enter the Check Group name (i.e. “Incidents” or “Health and Wellness”)
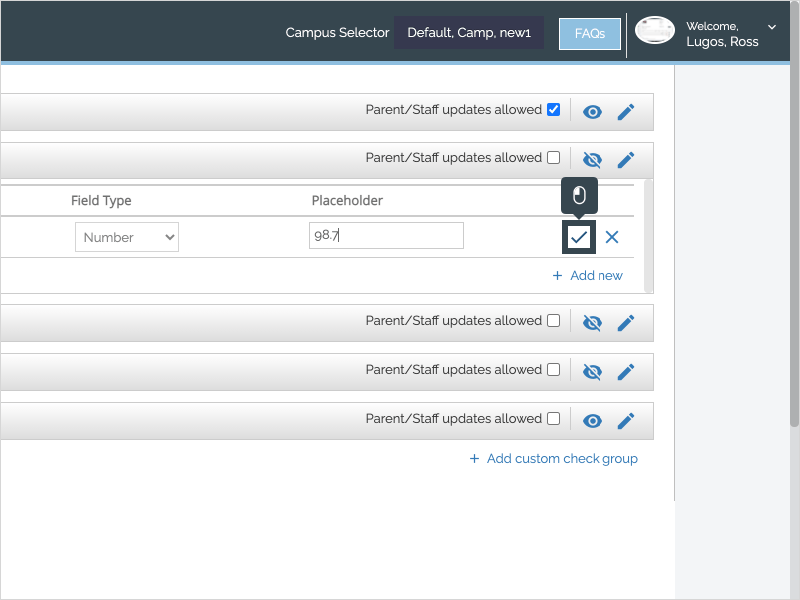
- Click the checkmark to save
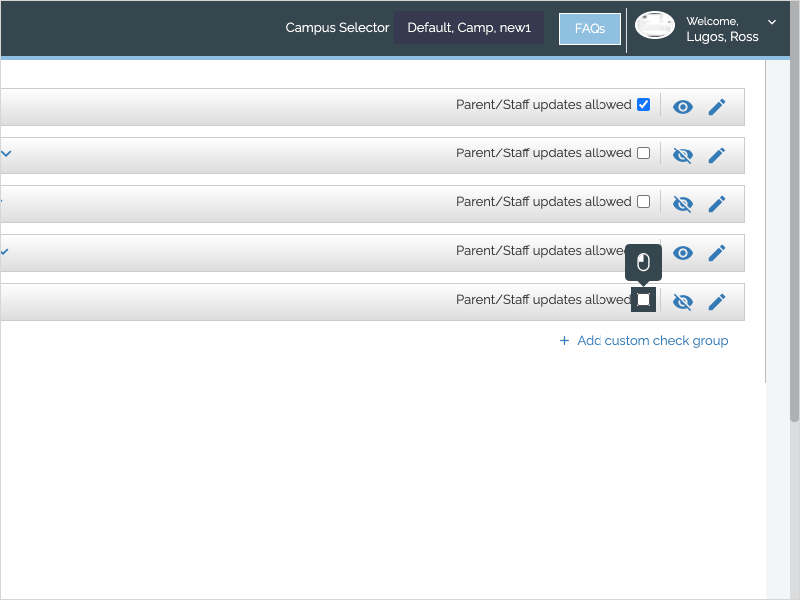
- Check the “Parent/Staff updates allowed” checkmark if you wish to allow parents or staff to complete their own checks. *Note: recorded checks are visible to the child’s parents in their child’s History tab, regardless of whether parent updates are allowed.
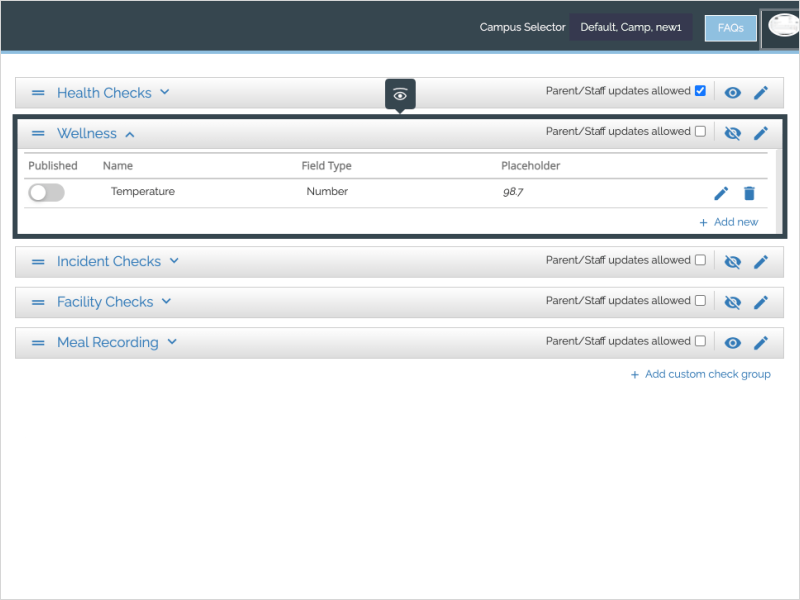
- Click the Eyeball icon to mark the check group as published (visible) or unpublished (not visible). You will not be able to record a check to a check group that is unpublished.
- To reorder the check groups (which will control the order on the student’s Compliance tab), click the two-line icon on the left of the Check Group name and drag the group into a new order.
Step-by-Step
1. The first step is to open Curacubby and click Settings under Compliance
2. Click Add custom check group
3. Enter the Check Group Name

4. Click the Checkmark to save

5. Click Parent/Staff updates allowed if you want to enable parents and staff to enter checks for this group (please note that all compliance checks are visible to parents in the student's History tab, regardless of the parent/staff updates setting).
6. Click the Eyeball to publish or unpublish a check group. You cannot record checks within that check group if the check group is unpublished.

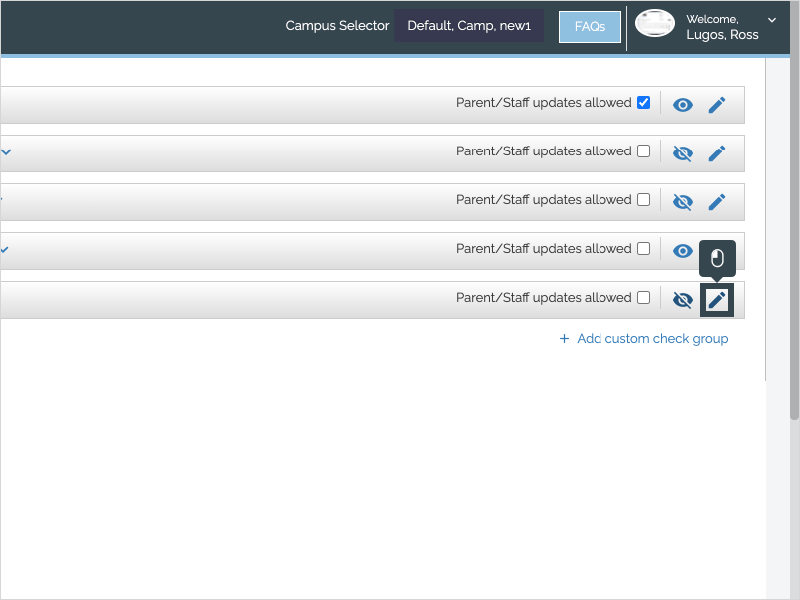
7. To edit the Check Group Name click the Pencil icon
8. Click the Arrow to expand the check group and see the individual checks within the group.
9. To re-order the check groups, click and drag the group using the icon on the left

10. That's it. You're done.
Here's an interactive tutorial
https://www.iorad.com/player/1749274/Create-and-Manage-Check-Groups
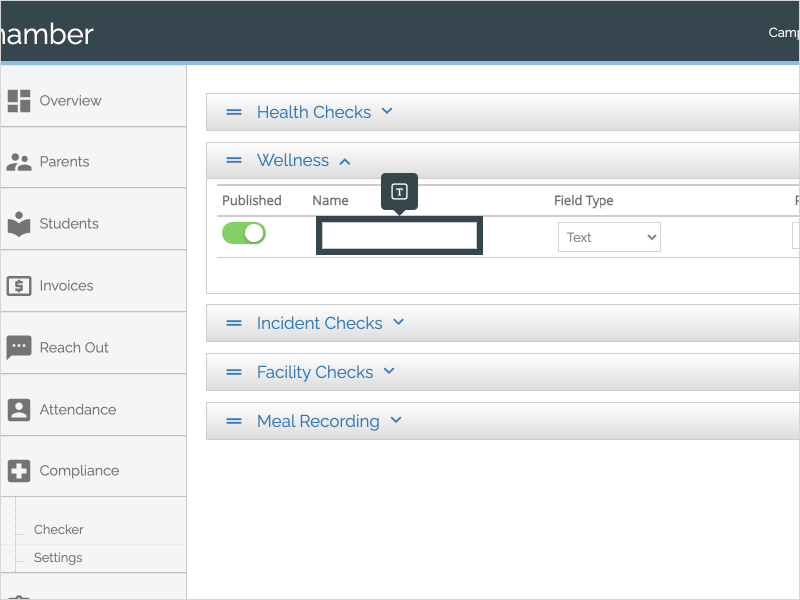
To create a check:
- Click “Settings” under “Compliance” on the left sidebar
- Click the down arrow on the check group to which you want to add a check
- Click “+ Add New”
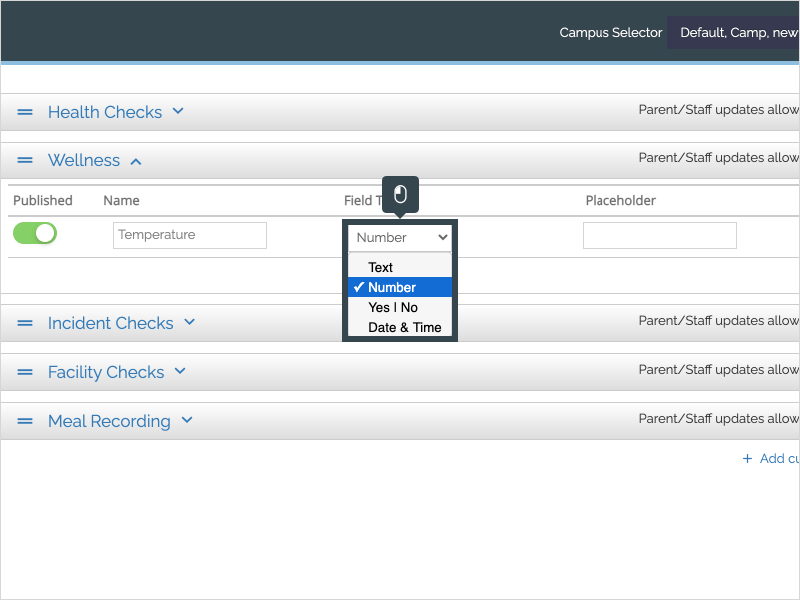
- Enter the check name
- Select the check type: text, number, yes/no, or date & time
- Use “Text” for checks where parent/staff will enter free text, such as details about an incident or type of participation.
- Use “Number” for checks where parent/staff will enter a number, such as a temperature or hours of sleep.
- Use “Yes/No” for checks that would have a yes/no answer, such as “Does the student have a cough?” (Yes/No appears as a checkbox on the “Checks” page)
- Use “Date & Time” for checks that require a date/time stamp, such as “Date of participation.”
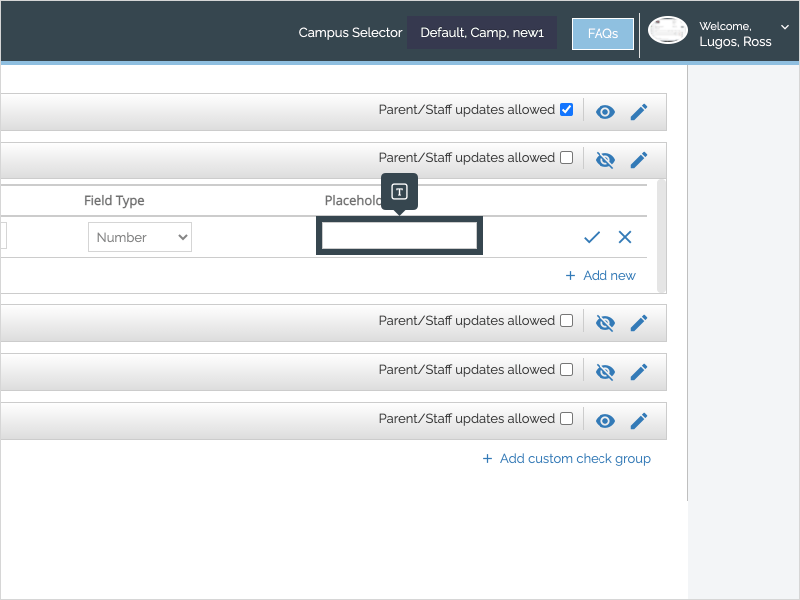
- Enter a placeholder (required). The placeholder text appears on the “Checks” page
- Click the Checkmark to save
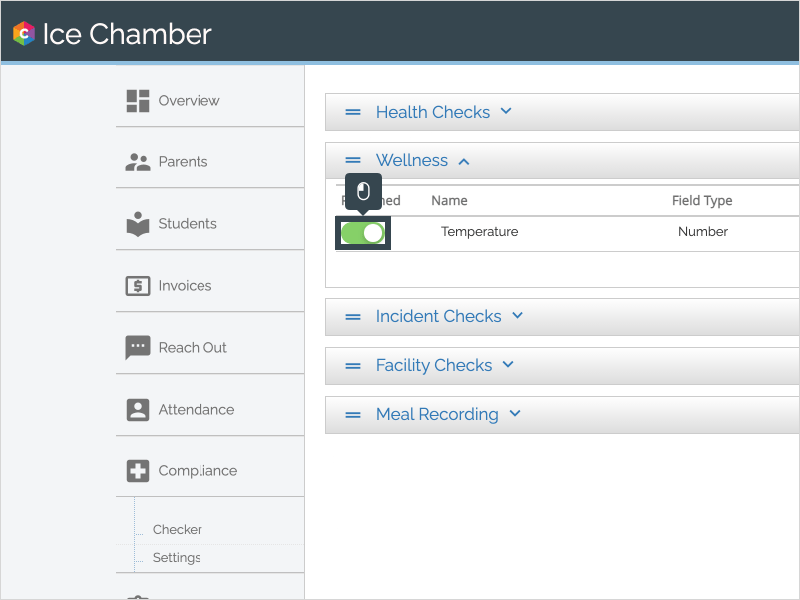
- Click the “Published” toggle to publish or unpublish the check. You will not be able to record checks for an unpublished check.
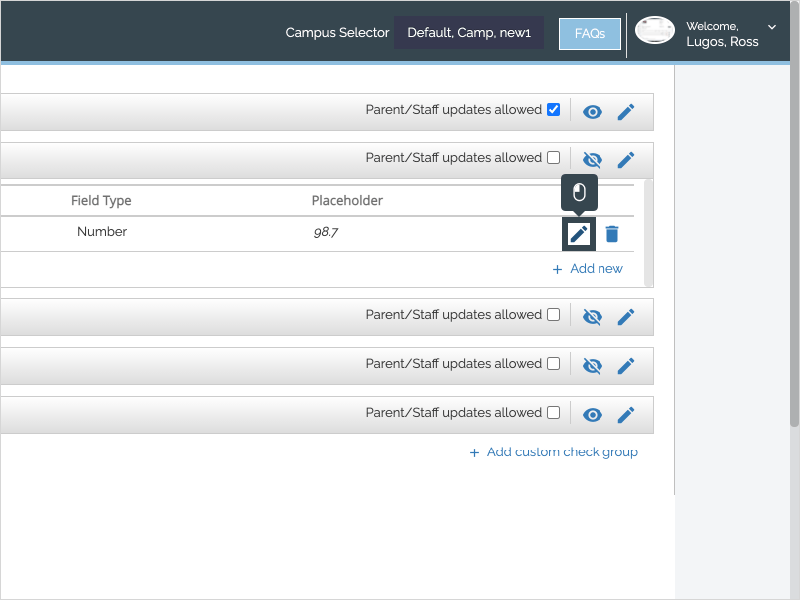
- To edit an existing check Name, Type or Placeholder, click the pencil icon, enter your changes, then click the checkmark icon.
Step-by-Step
1. The first step is to open Curacubby and click Settings under Compliance
2. Click the Arrow to expand the check group
3. Click Add new
4. Enter the Check Name
5. Select the Check Type: text, number, yes/no, or date & time.
6. Enter a Placeholder (required).
7. Click the Checkmark to save
8. Click Published toggle to unpublish or publish a check. You will not be able to record a check that is unpublished.
9. To edit a check (change the name, field type, or placeholder), click the Pencil icon
10. That's it. You're done.
Here's an interactive tutorial
https://www.iorad.com/player/1749282/Create-and-Manage-Checks
