
Use Tag Reports to create reports with parent and student data.
How to Create, View, and Download a Tag Report:
You can use tag reports to show parent and student information by using tags as a filter.
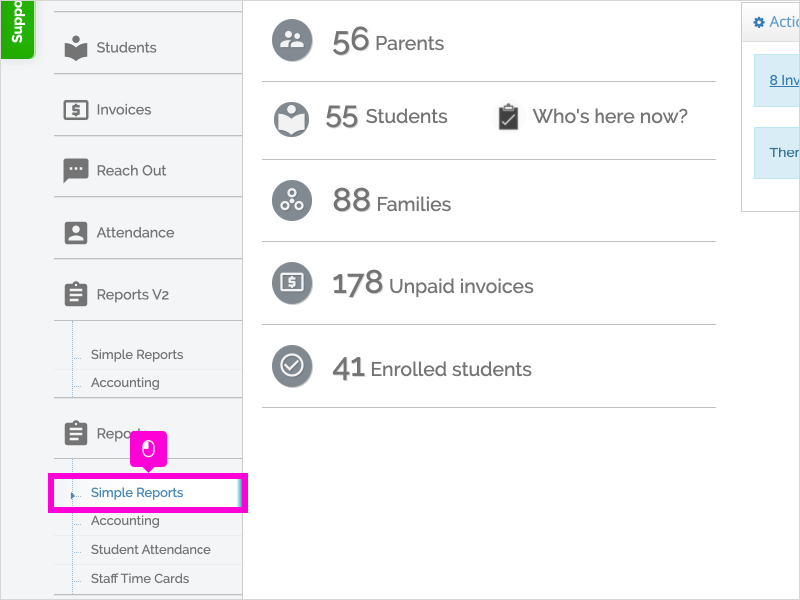
- Click on “Tag Reports” under the Reports section on the left sidebar
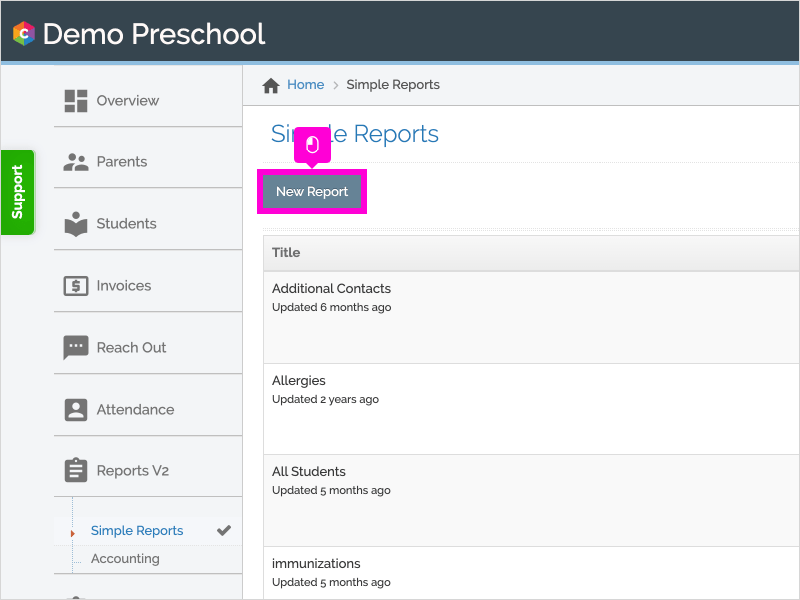
- Click “New Report”
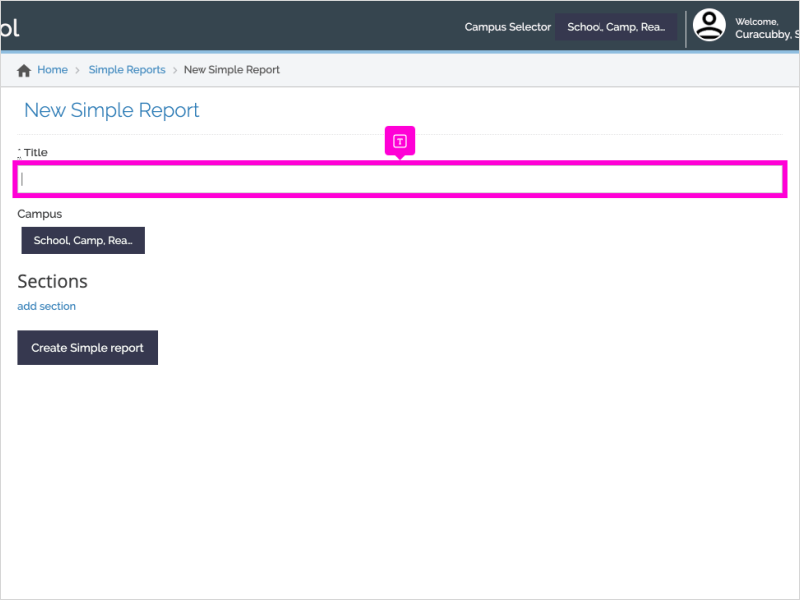
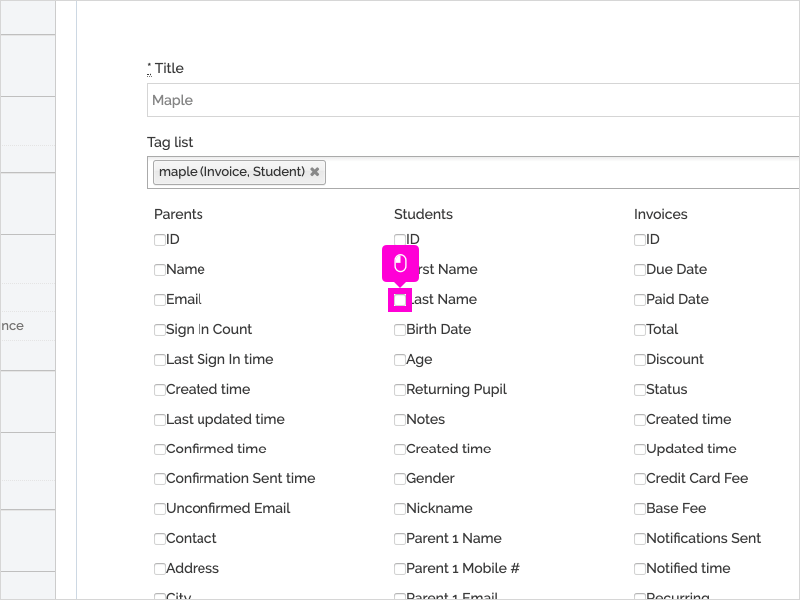
- Type in the title (Allergies, Birthdays, Class List).
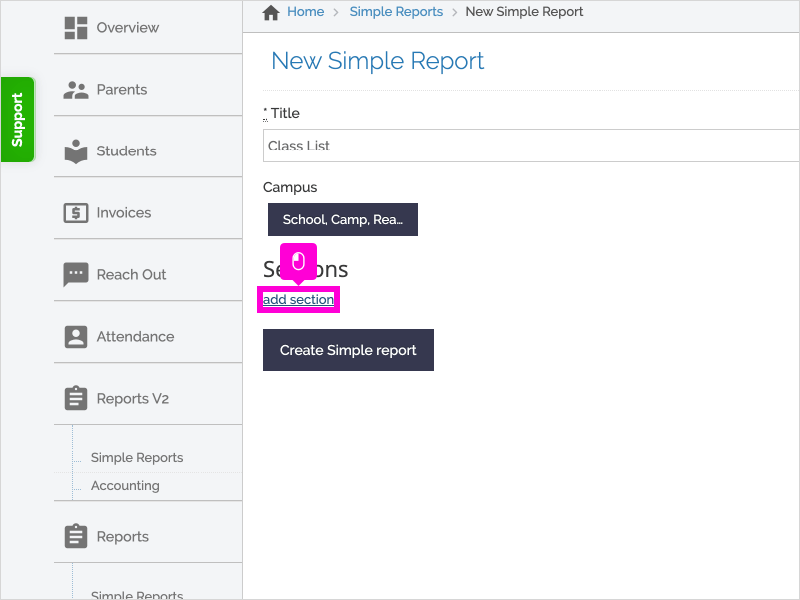
- Click “Add Section” and then expand the section.
- Type the section title. This will be one section of your complete Tag Report. For example, if you are creating a Tag Report for classroom lists, you might have one section for each classroom at your school.
-
Type in the Tag list for any tags you give your students, parents, or invoices. Type “All available tags” if you want to see all students, parents, or invoices. **Note: tags act as an "and" function in tag reports. If you use multiple tags, the report will look for instances that include the tags together.
- Choose the boxes next to the information you want to include.
- Click “Add Section” to add another section. This is helpful if you want to create one report with different groups or classrooms of students, i.e. a birthday list of each separate classroom.
- Click “Create Tag Report”
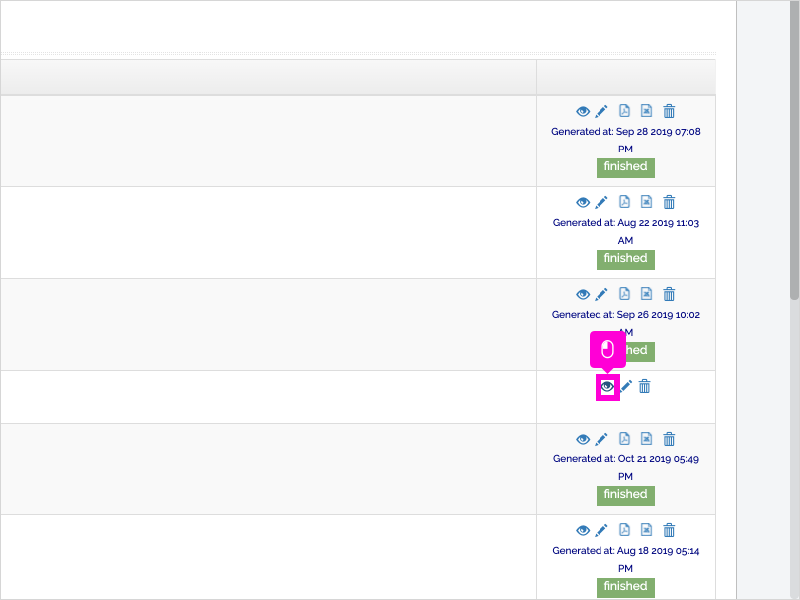
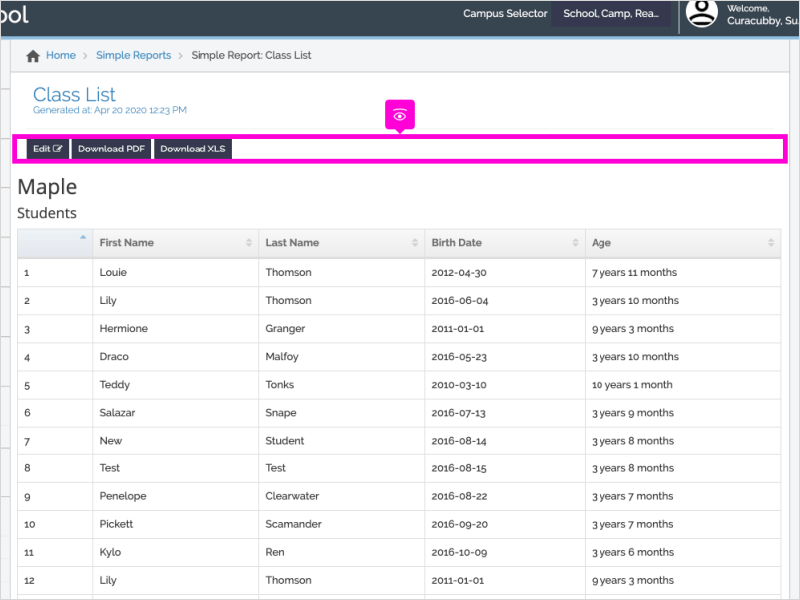
- Use the Eye icon to view your report.
- Use the buttons near the top to download the report to PDF or XLS format
**Note: tags act as an "and" function in tag reports. If you use multiple tags, the report will look for instances that include the tags together.
NOTE: If you want to group classrooms together, you can add a common tag to each classroom which will allow you to have all students show up in the same section
Anytime you make any updates to accounts by removing or adding tags, you will need to regenerate the Tag Report so it will show the most updated information. all you will need to do is click the "Generate Report" button (eyeball).
For more information on tags, see the Tags FAQ.
STEP BY STEP GUIDE
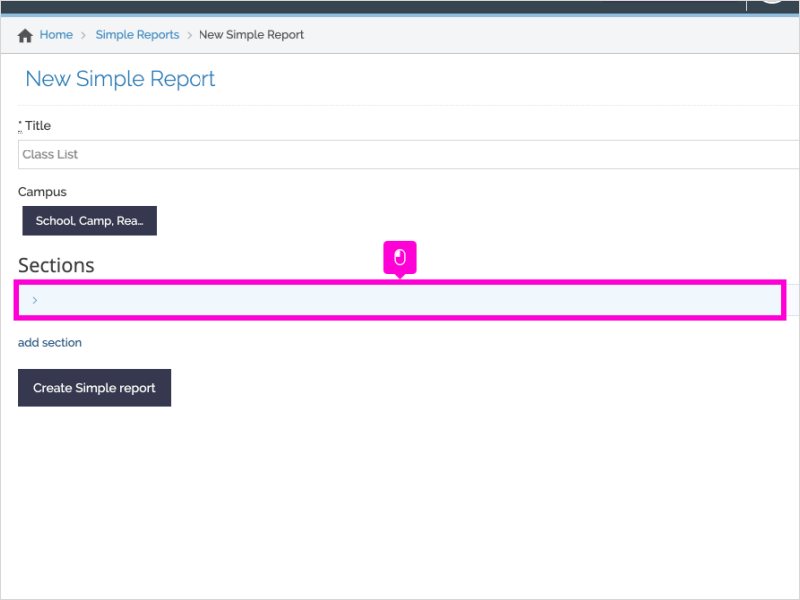
1. The first step is to open Curacubby and open Simple Reports
2. Click New Report
3. Type Title (examples: Class List, Allergies, Parent Contacts, etc.)
4. Click add section
5. Click the arrow to expand the section
6. Type the Section Title. This will be one section of your complete Simple Report. For example, if you are creating a Simple Report for classroom lists, you might have one section for each classroom at your school.
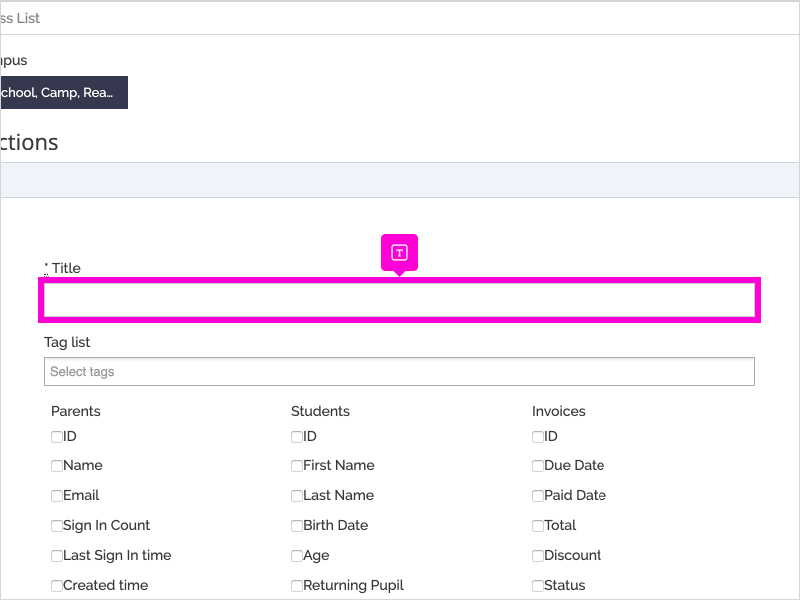
7. Type the Tag based on the tags you gave your students, parents, or invoices.
Tags act as an "and" function in simple reports. If you use multiple tags, the report will look for instances that include the tags together.
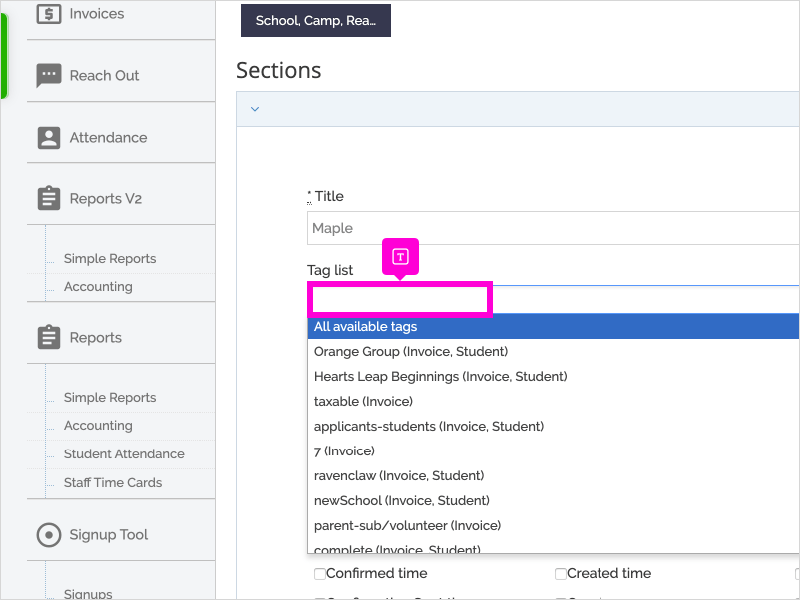
8. Click on the desired tag from the drop-down
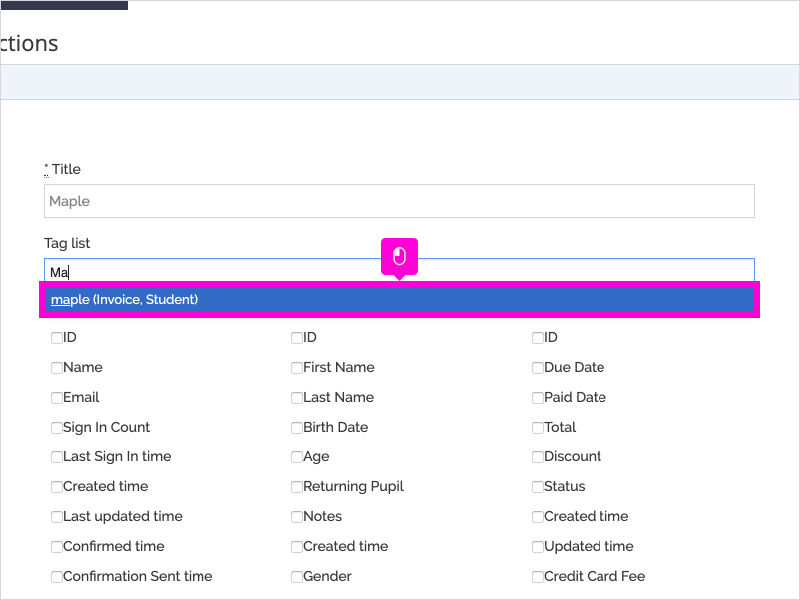
9. Choose the checkboxes next to the information you want to include
10. Click Add Section to add another section (use this if you want to create one report that includes different groups/classrooms of students. i.e. each section will have a different tag, and therefore include a different classroom)
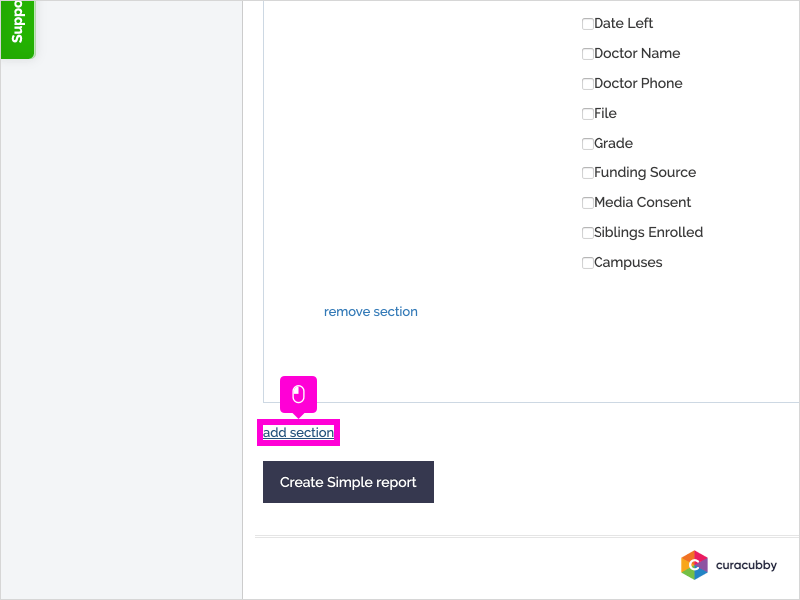
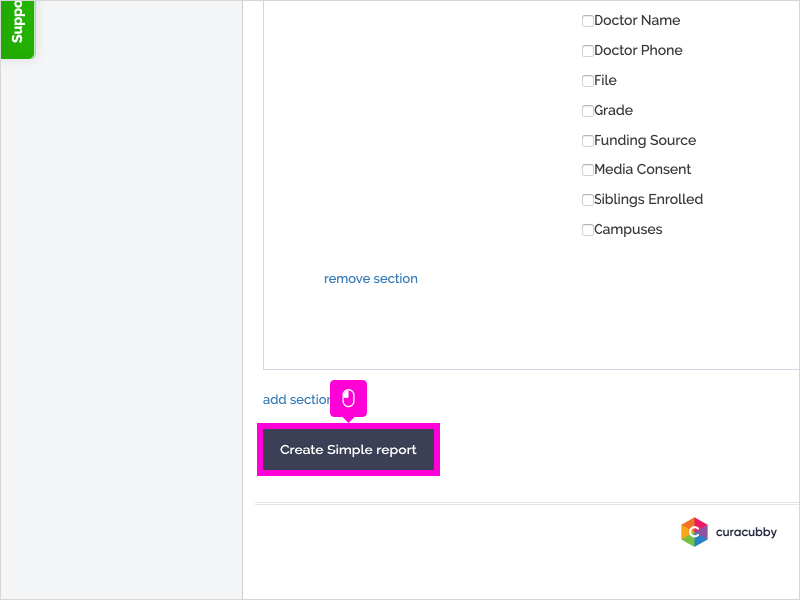
11. Scroll down and click Create Simple report
12. To view the report, find the desired Report

13. Click the eye icon to view the report
14. Review the information generated from the report
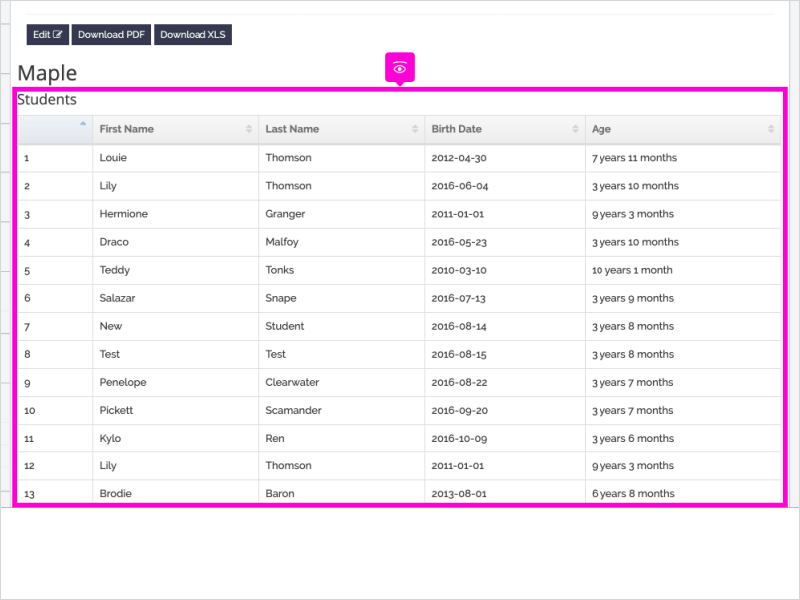
15. You can download the report to PDF or XLS format using the buttons
16. That's it. You are done.

Here's an interactive tutorial
https://www.iorad.com/player/82509/Creating-a-Simple-Report
