
Please follow the steps below to add additional emergency or pick up contacts to a student's record.
To add additional contacts:
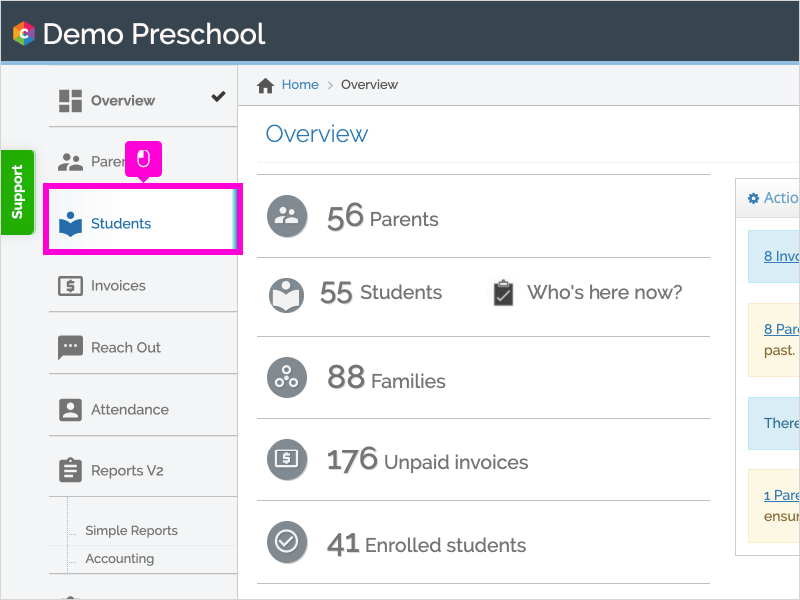
- Click on “Students” on the left sidebar.
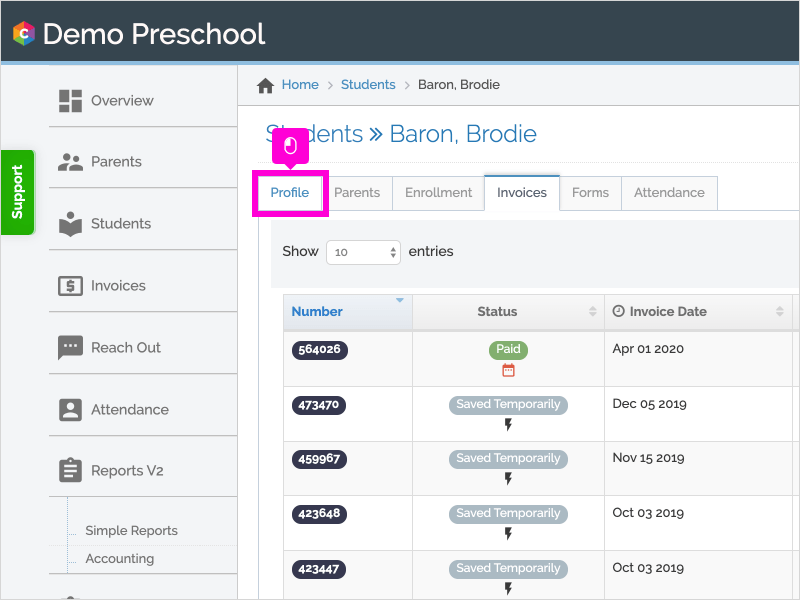
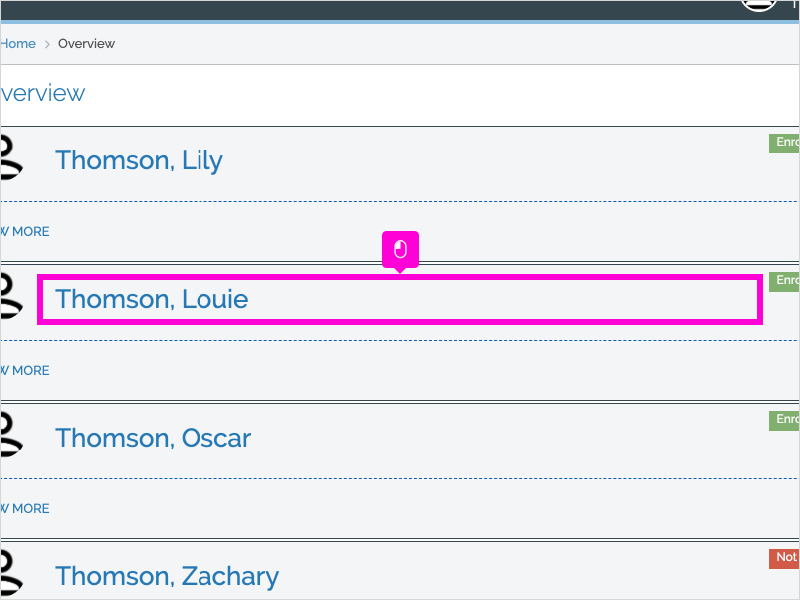
- Click on a student's name.
- Click the “Profile” tab.
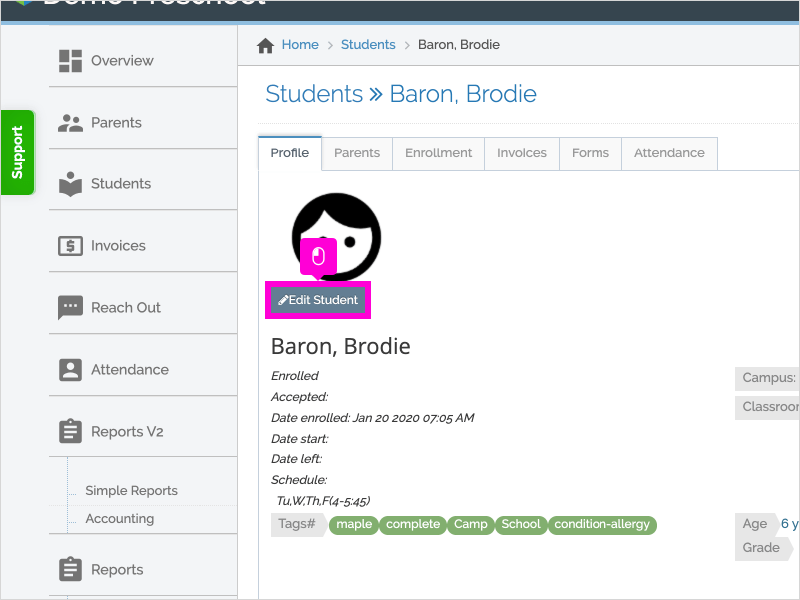
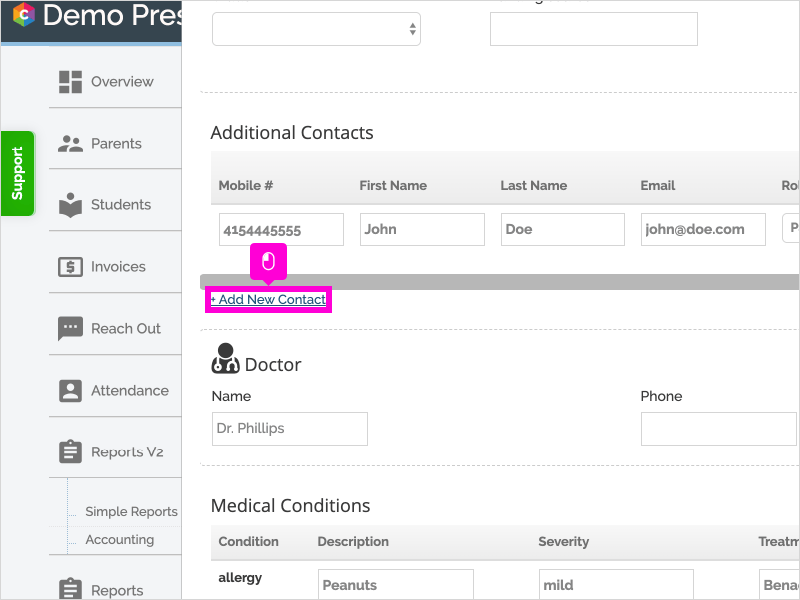
- Click “Edit Student” and then scroll down and click “Add New Contact.”
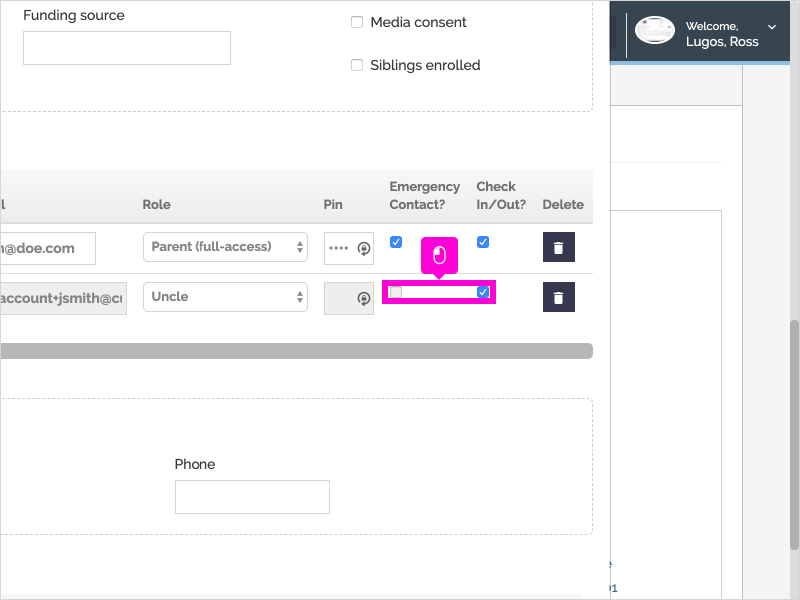
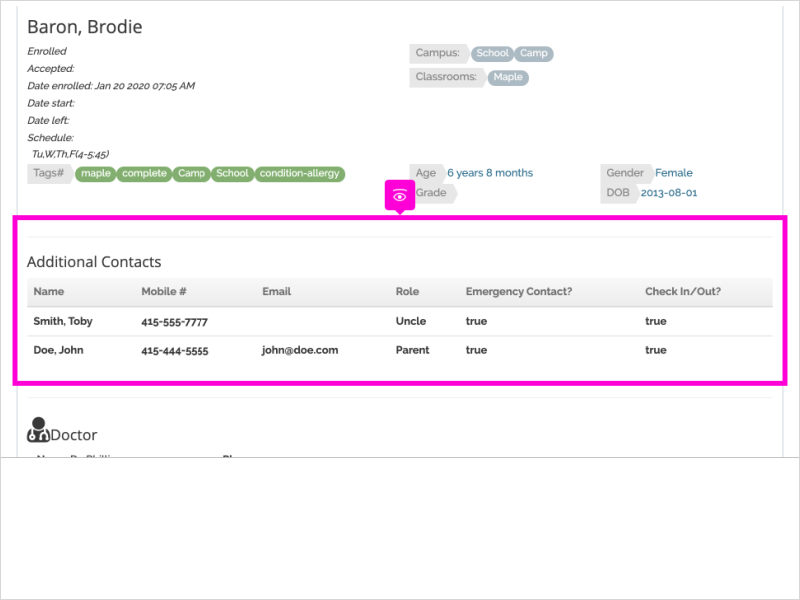
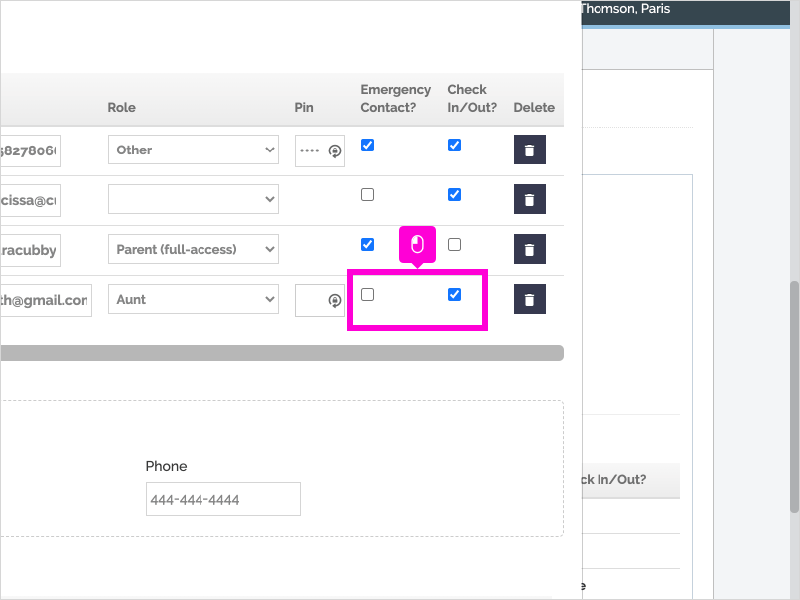
- Enter the contact's name and phone number (all other fields are optional). The "Check In/Out" checkbox must be checked to authorize the contact to check the student in/out using digital attendance.
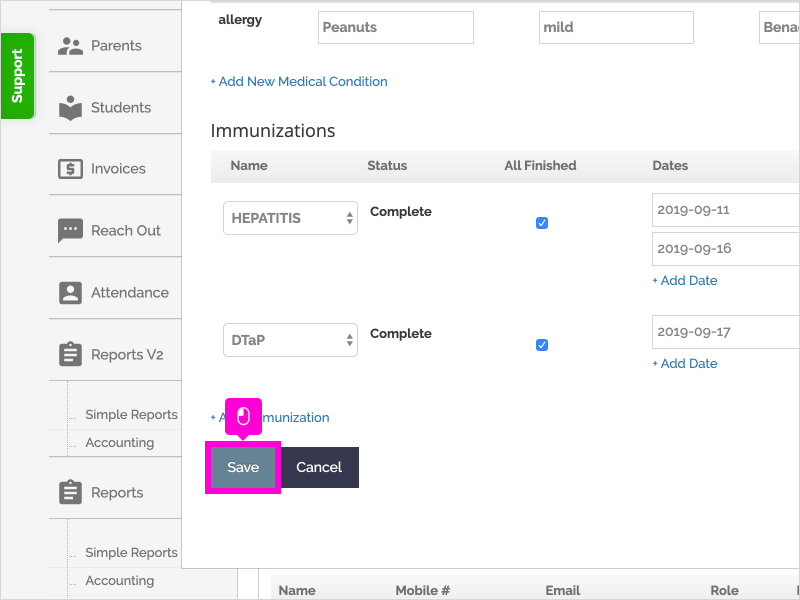
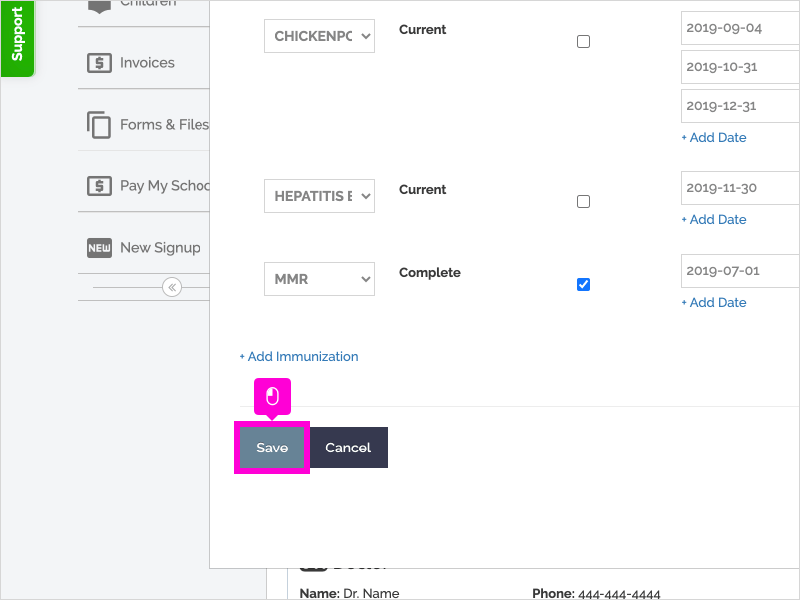
- Scroll down and click "Save" to save the new contact.
Step-by-Step
1. Open Curacubby and click Students
2. Click the Student's Name

3. Click the Profile tab
4. Click Edit Student
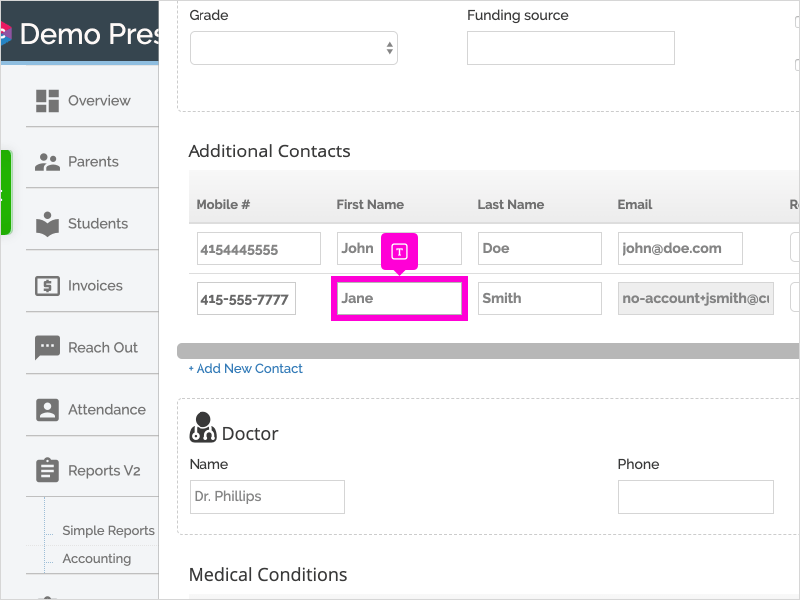
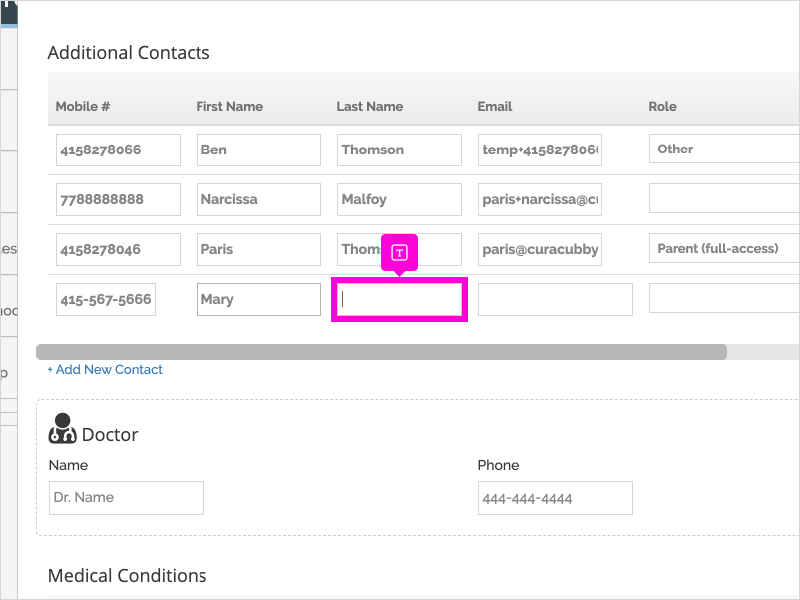
5. Scroll down and click + Add New Contact
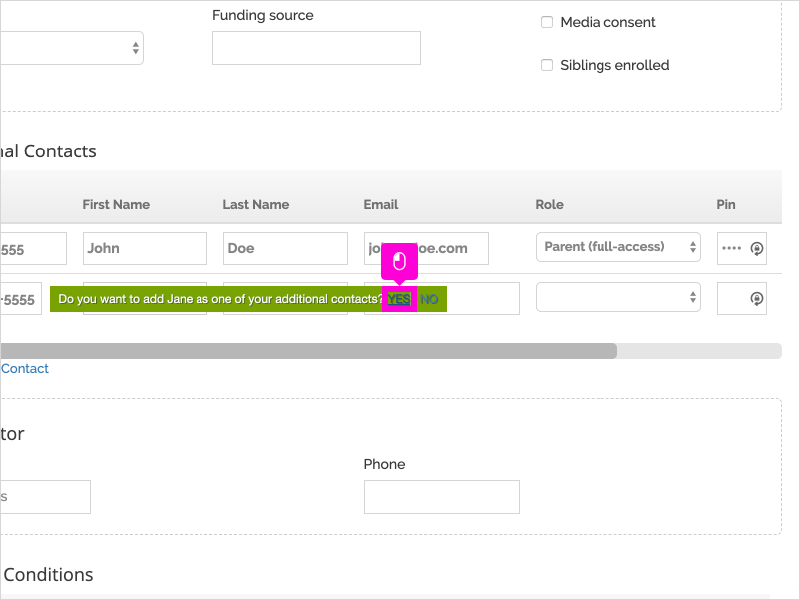
6. Enter the contact's Mobile Phone

7. If the user already exists, you will be prompted to add that user as an additional contact. Click YES and the users' remaining fields will autofill.
8. If the contact does not already exist, enter the contact's Name and email address (optional).
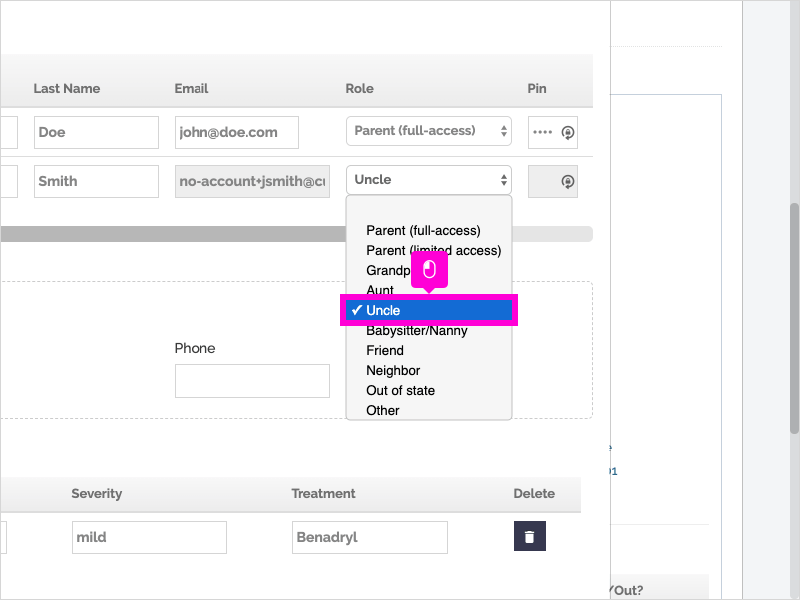
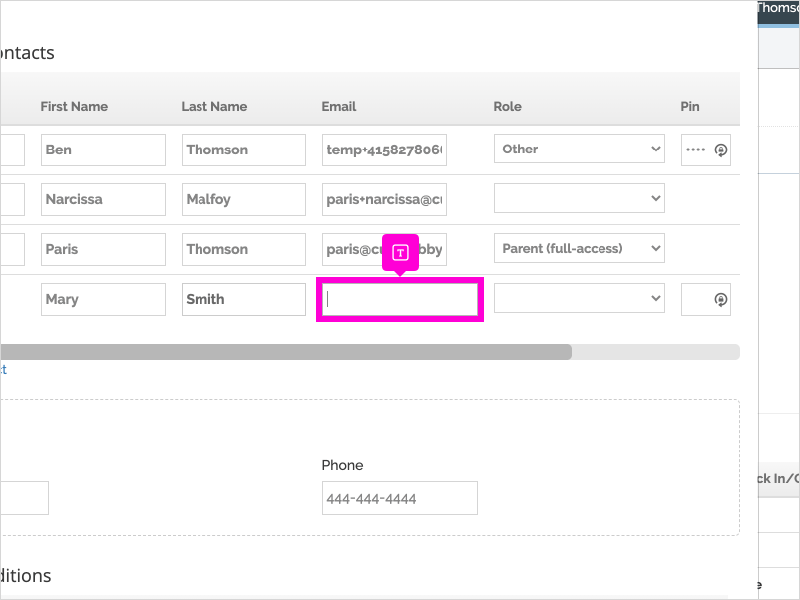
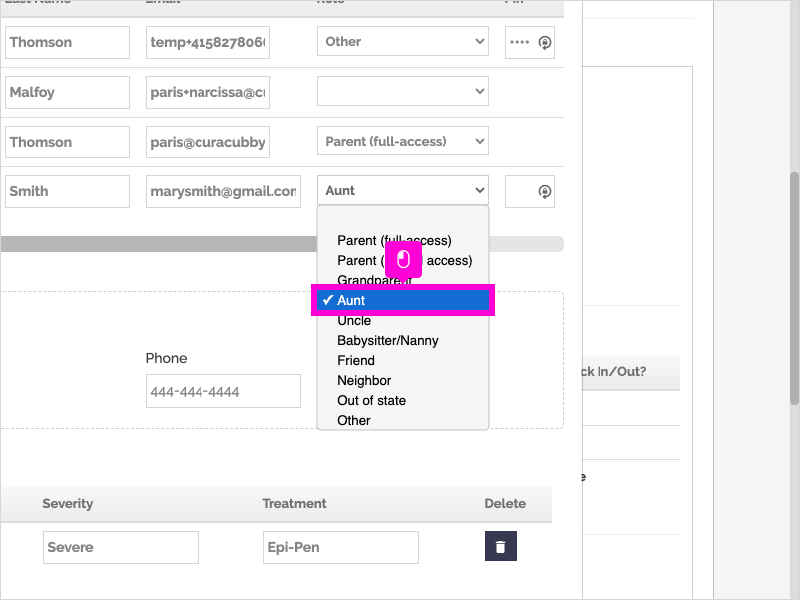
9. [Optional] Select the contact's Role.
10. Type the contact's PIN if they will be using Curacubby's digital attendance (check in/out). This is a 4-digit code the contact will use to check your student in and out. (The contact can set this themselves).
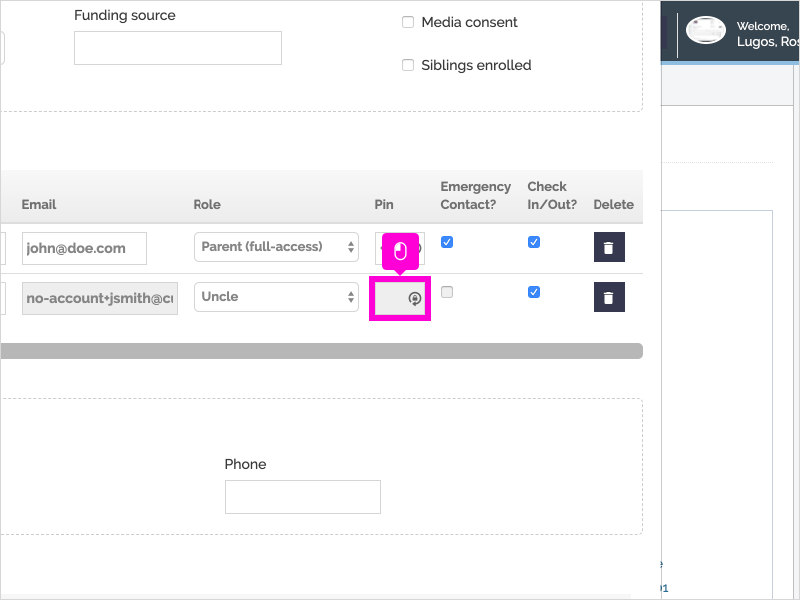
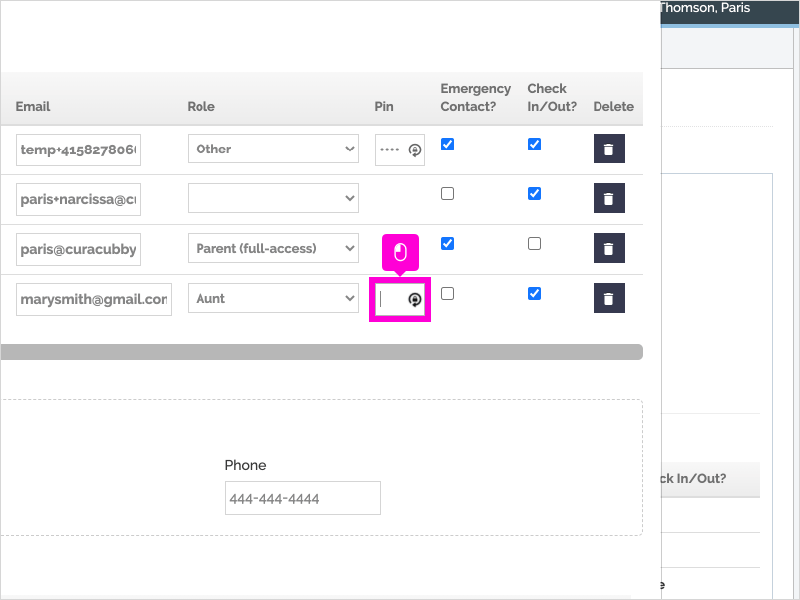
11. Select whether the contact is an emergency contact, can check in/out or both.
12. Scroll down and click Save
13. That's it. You're done.
Here's an interactive tutorial
https://www.iorad.com/player/49187/Adding-additional-contacts-for-check-in-check-out
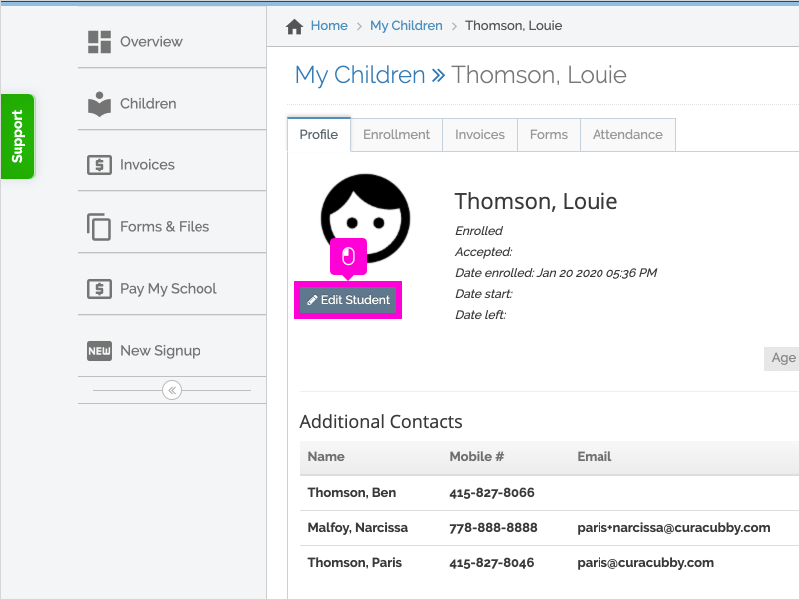
To add additional contacts from the parent portal (you can provide these instructions to parents):
- Log into your Curacubby account.
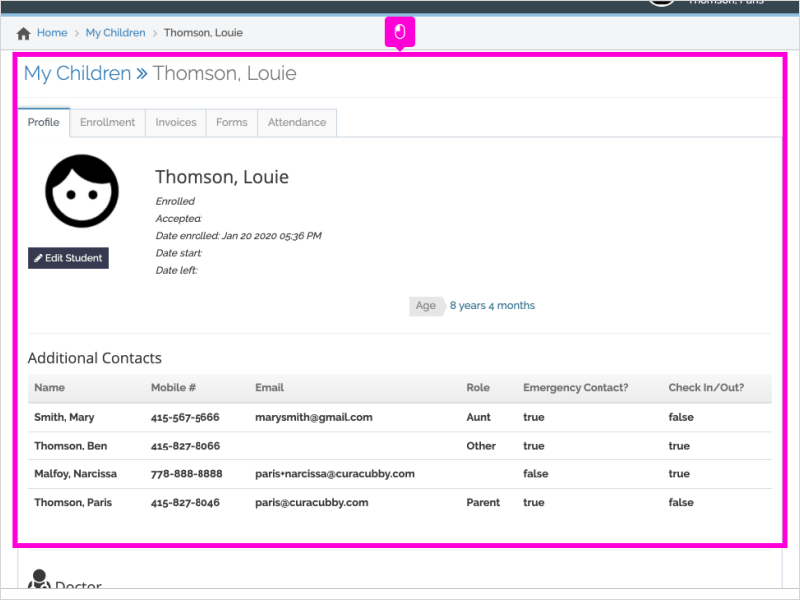
- Click on the "Children" tab and then click on your child's name.
- Click "Edit Student."
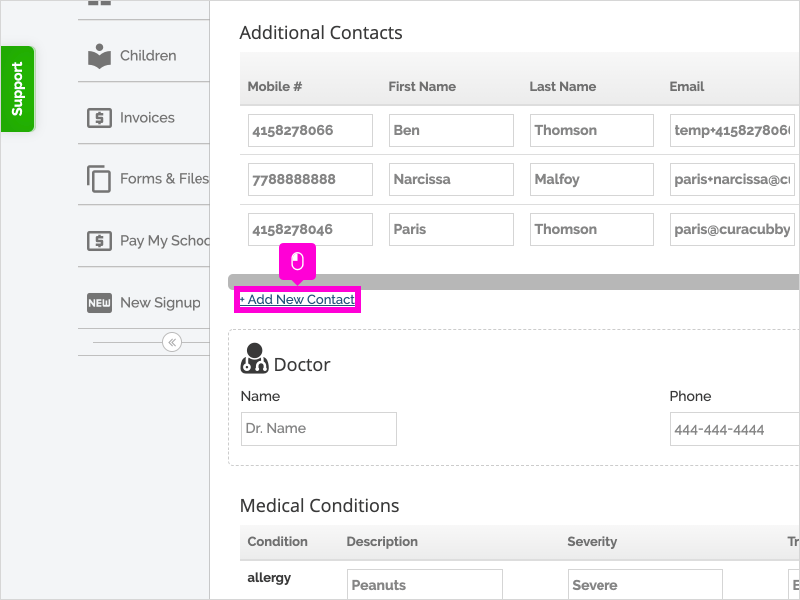
- Scroll down and click "Add New Contact" under the Addition Contacts section.
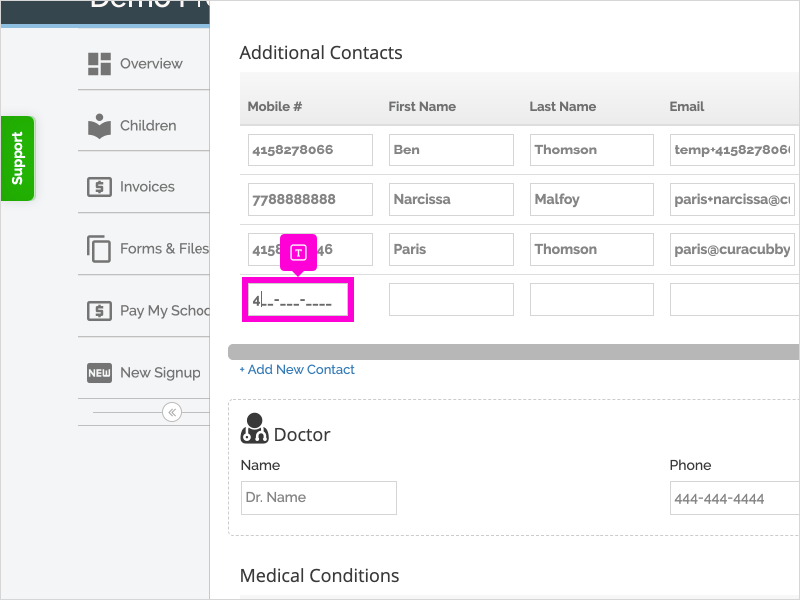
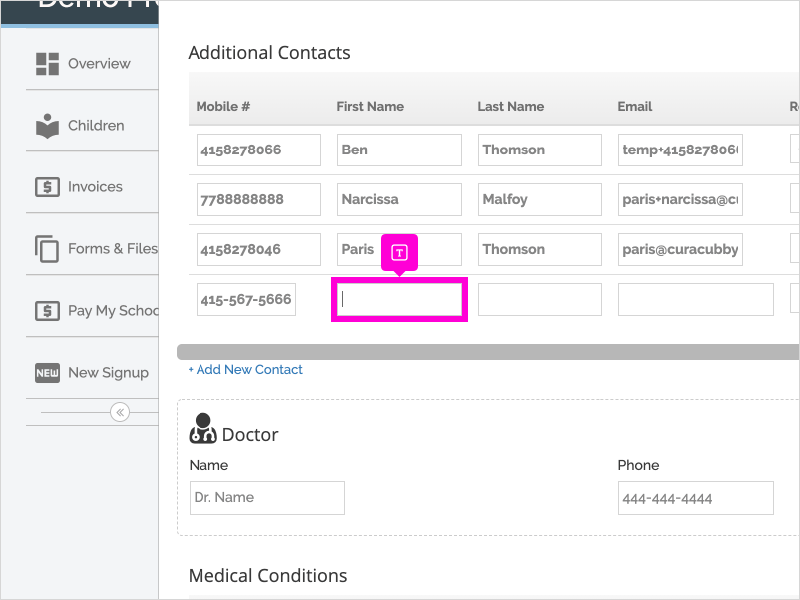
- Enter the contact's name and phone number (all other fields are optional)
- Click "Save."
Step-by-Step
1. The first step is to open Curacubby and click your Student's Name
2. Click Edit Student
3. Scroll down and click + Add New Contact
4. Enter the contact's Phone Number
5. Enter the contact's First Name
6. Enter the contact's Last Name
7. [Optional] Enter the contact's email address
8. Select the contact's Relationship to Student
9. [Optional, for digital attendance only] Enter the contact's PIN. (Note: if the additional contact already has an account, you will not be able too set their PIN)
10. Select whether the contact is an Emergency Contact and/or is authorized to Pickup.
11. Scroll down and click Save
12. That's it. You're done.
Here's an interactive tutorial
https://www.iorad.com/player/87599/Add-Additional-Contacts
