
This article will outline the use of student PINs in regards to students checking themselves in/out for attendance
To enable the student self check in/out:
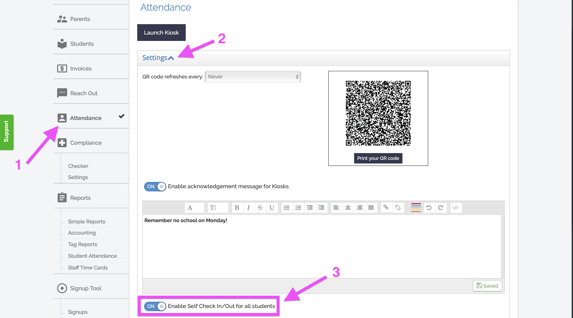
- Click the Attendance Tab
- Click the drop-down list for Settings
- Ensure that the toggle "Enable Self Check in/Out for all students" is ON
Each student's unique PIN is located under their Student Profile Tab:
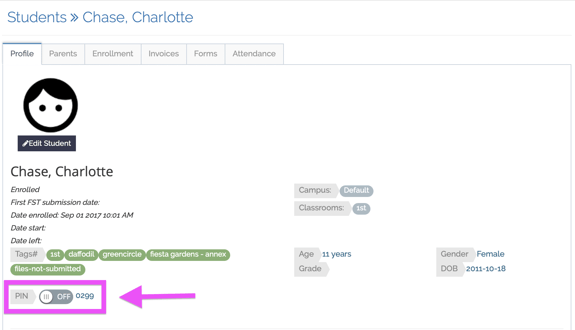
NOTE: The PIN will only successfully check the student in/out if toggled ON
Student PINs are unique to each student and can't be changed
For students to Use Self Check In/Out:
- Ensure that student PIN is toggled "on"
- Click student name under Students tab to access student profile
- Click the student's profile tab
- Click the PIN toggle to "ON"
- Launch the kiosk
- Click the Attendance tab
- Click the "Launch Kiosk" button
- Click "Student Check In" located at the top of the kiosk
- Have the student enter their 4 digit PIN to check in
Here is a quick video showing how to toggle on a student PIN and launch the student check-in kiosk:
Within your attendance reports, the student's name will appear as the person who has checked this student in/out.
To generate a list of all Student PINs, use the Student PINs Simple Report:
- Click Simple Reports
- Search for the report "Student PINs"
- Click the report name to generate
- If report is already generated, you can click the eye icon to view last generated report
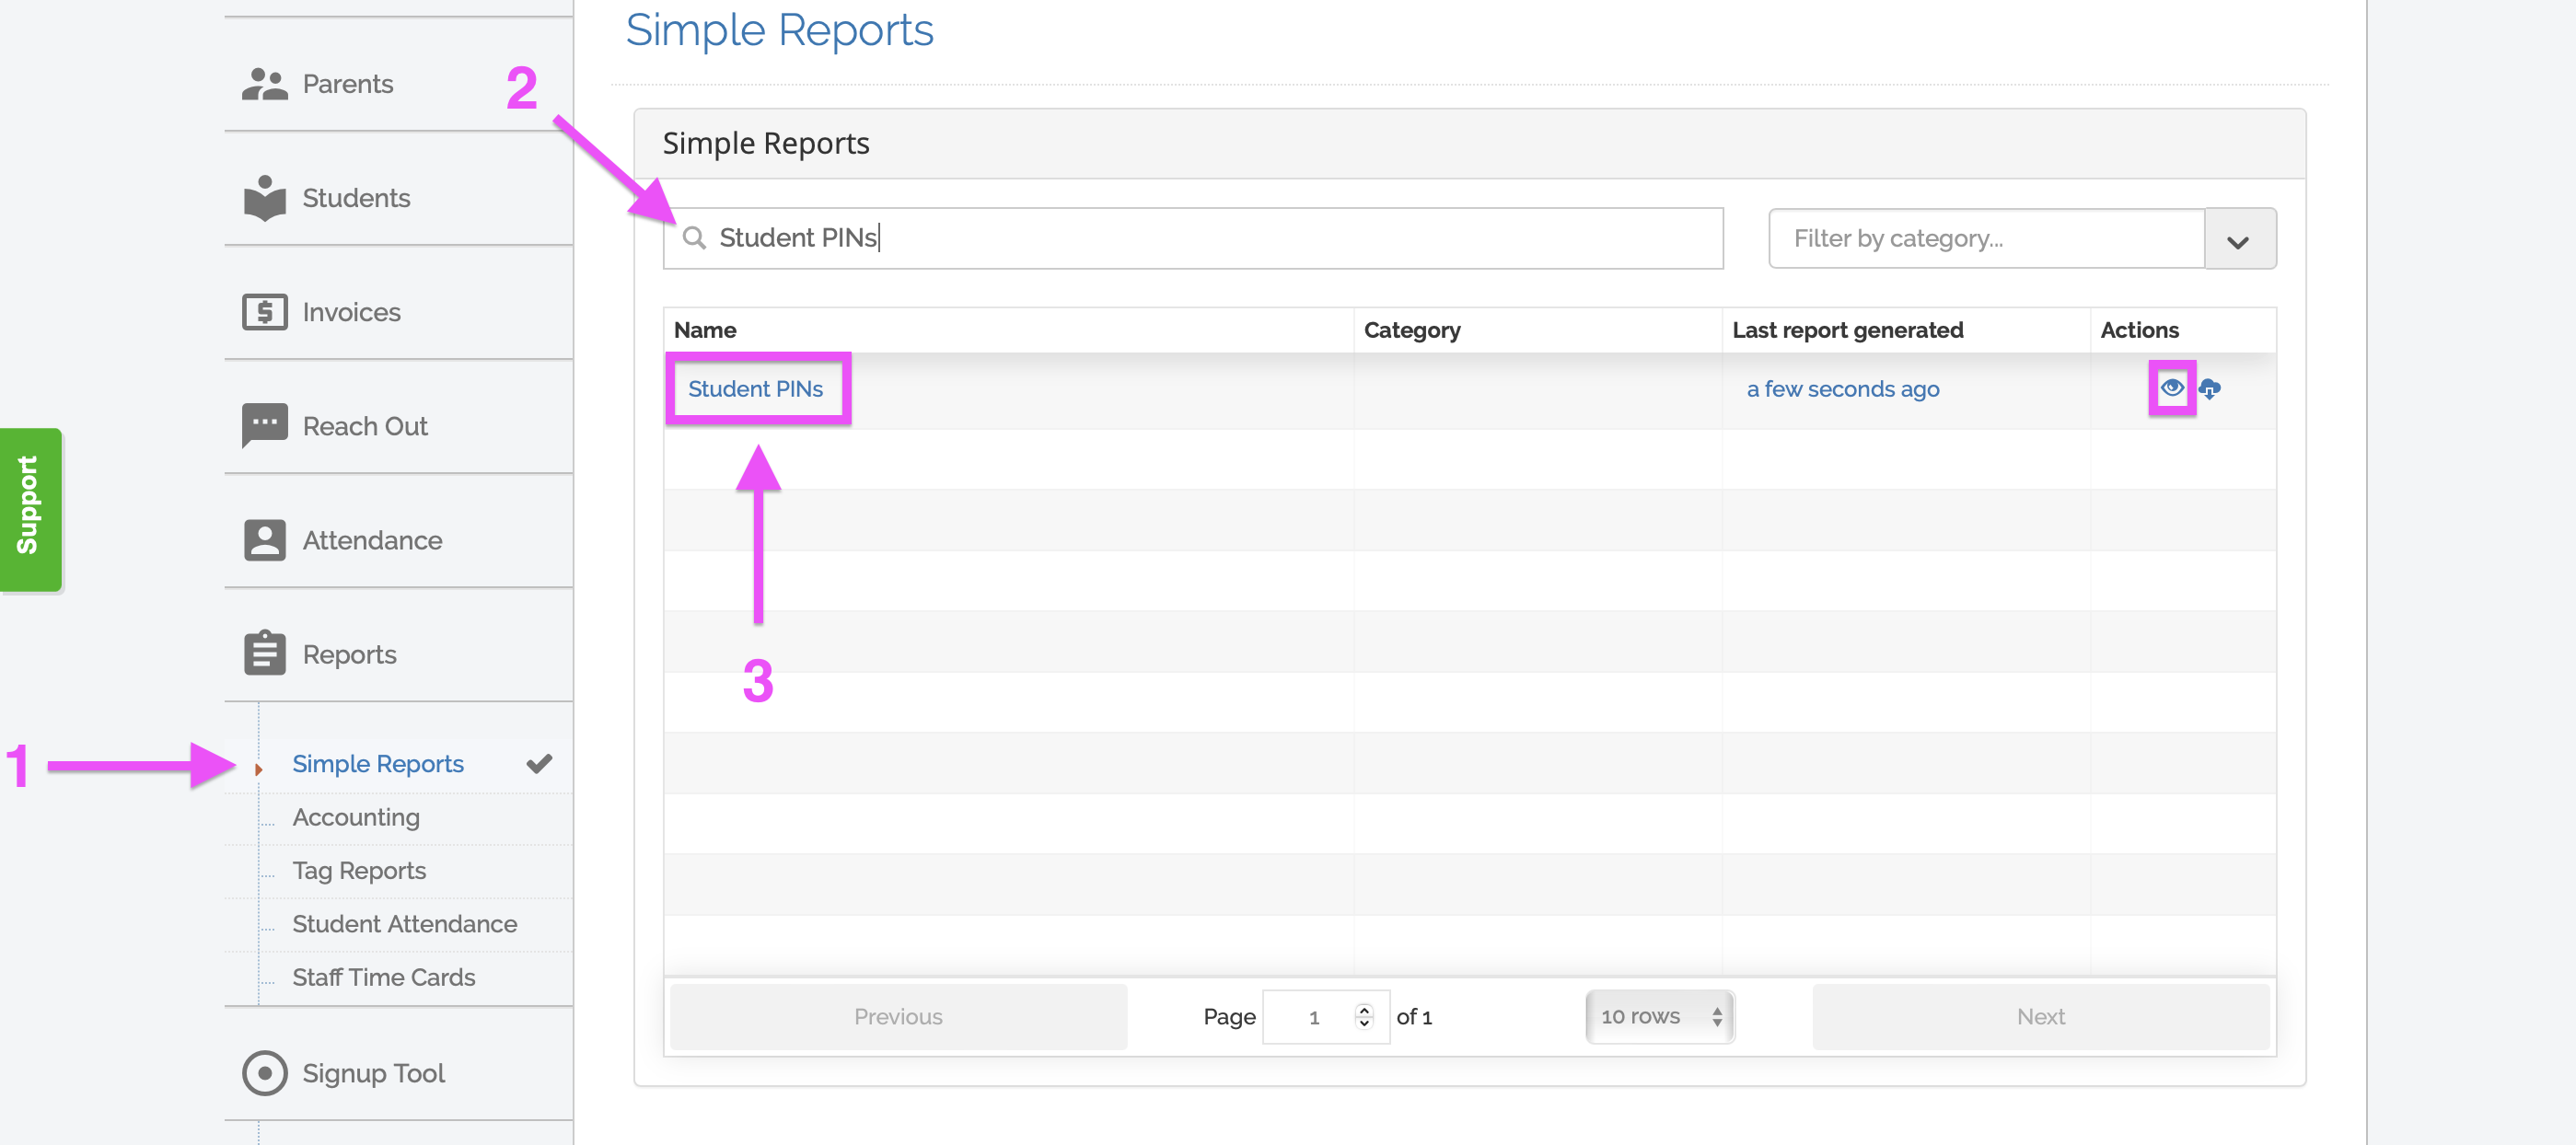
NOTE: Only students with their student PIN toggled "ON" will generate in this report